Choosing a layout for your new page in dreamweaver
Learn how to choose and create a new layout in Dreamweaver.
It's important to choose or create a layout in Dreamweaver that is both visually appealing and easy to navigate for your users. They should also be compliant to web standards.
A good layout would include the following:
- Header - This is the area that you place your image and logo.
- Navigation bar or panel - This is the area where your navigation menu links are placed. Either top or beneath the header or on the side.
- Content area - This is the area where you insert your main content in text or images.
- Footer area - This is the area where you place copyright info, text links.
- Click here to learn how to define your web page properties in Dreamweaver.
Layouts can either be CSS or tables based or a combination of both CSS + tables. For user and search engine friendly as well as for fast downloading sites we recommend using CSS in your layouts. However, you should have some basic knowledge in using CSS in your layouts.
The sample template shown below has a header, a side navigation menu bar, a main content area and a footer area for the copyright information.
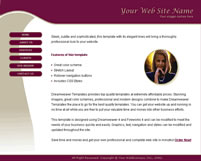
Using ready made layouts from templates are a real timesaver. You can replace backgrounds, layout colors, images and logos to give the layout your own unique look without having to create a layout from scratch using Photoshop or Adobe Fireworks.
Dreamweaver CS5 includes many basic CSS layouts that you can use for your website projects. To choose a CSS layout in Dreamweaver CS5, do the following:
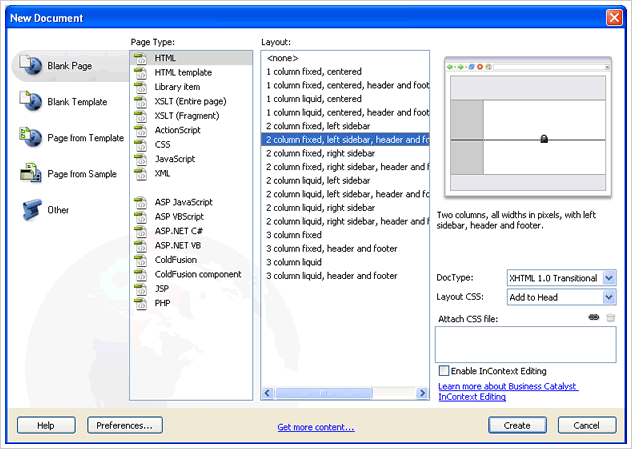
From main menu select 'File > New'
Choose the 'Blank Page' category in the first column. 'HTML' in the second column and one of the layouts in the 'Layout' category.
Rollover the image below.
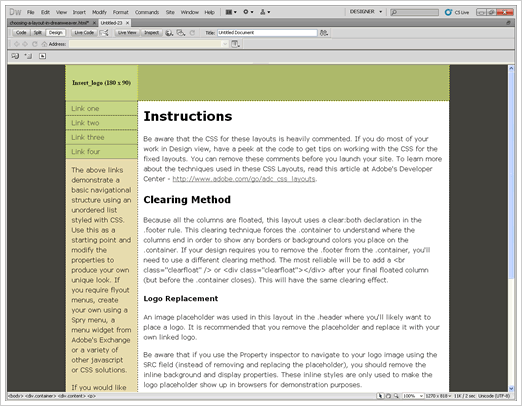
The CSS layout that we have chosen in the above example includes 2 columns, a header, logo area, a side nav bar (includes menus), main content area and a footer. Place your mouse over the screenshot above to rollover.
The CSS layouts in Dreamweaver CS5 do not use external Style sheets, instead the CSS code is embedded in between the 'Head' tags of the document, i.e. ><head> </head>
The beauty of using CSS is that all elements of the layout can be changed easily such as background colors, text size, font type, header height, layout and nav bar widths with a few simple clicks. The changes will only apply to the page you are working on.
Let's say for example we want to insert an image in the header background in the chosen layout above, do the following:
Step 1 : With the layout opened select from menu 'Window > CSS Styles'. The CSS Styles Panel will open.
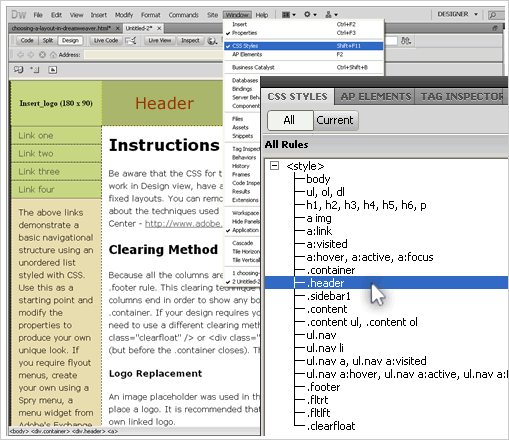
Step 2 : Double-click on the 'header' style. The CSS Rule Definition box will open for 'header' will open.
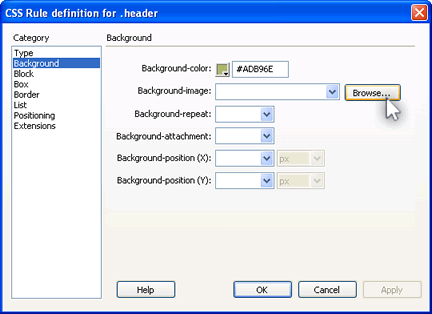
Step 3 : Select the category 'background' rule.
Step 4 : Browse to the location of your header image that you wish to use in the header background. Click 'OK'.
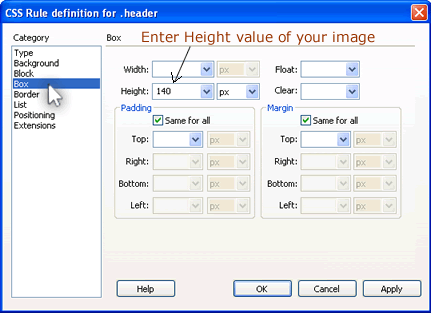
If your image height is bigger than the header style then your header background image will appear truncated (cutoff). To correct this increase the height of header area in 'Box' category to match the height of the actual image.
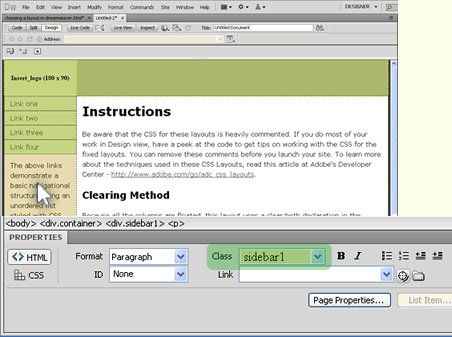
To change the background color of the sidebar, click anywhere in the sidebar and with 'Property Box' opened, you can see the style opened for the navbar.
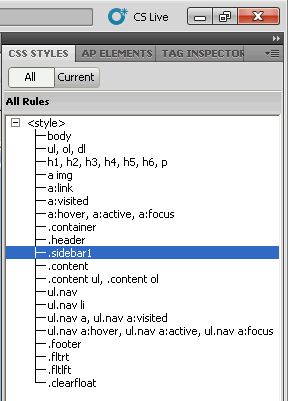
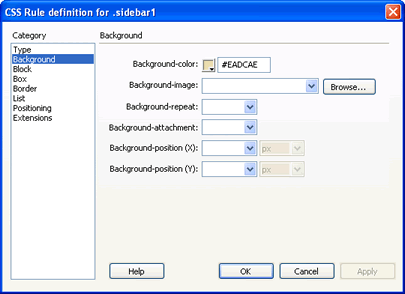
Open the CSS Styles Panel (Window > CSS Styles), double-click on 'sidebar1' and open the 'Background' category for the style. Change the color hex value of the background to your own choice. Click 'OK'.
You can also change the size of the text used in the left nav bar. Enter the size in the 'font size' drop-down and click 'OK'.
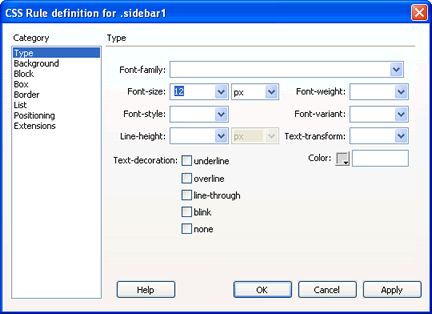
You can change the text size, color or font face for the content, sidebar and navigation menu link labels using the 'CSS Styles'.
To create additonal navigation menu links, switch to 'Code view' and copy and paste the link code:
<ul class="nav">
<li><a href="#">Link one</a></li>
<li><a href="#">Link two</a></li>
<li><a href="#">Link three</a></li>
<li><a href="#">Link four</a></li>
<li><a href="#">New Link</a></li>
<li><a href="#">New Link</a></li>
</ul>
Most of our website Templates use external CSS Style sheets which enable you to make sitewide changes instead of individual pages, saving you considerable time and effort.
This is how our templates would link an external Style Sheet to the pages in code view:
<!DOCTYPE html PUBLIC "-//W3C//DTD XHTML 1.0 Transitional//EN" "http://www.w3.org/TR/xhtml1/DTD/xhtml1-transitional.dtd">
<html xmlns="http://www.w3.org/1999/xhtml">
<head>
<meta http-equiv="Content-Type" content="text/html; charset=iso-8859-1" />
<title>Welcome Business Ideas </title>
<link href="style.css" rel="stylesheet" type="text/css" />
</head>


 Photoshop Templates
 Resources


